Performance Hack #014 : Solidworks Automation : SolidWorks Sketch reuse as Blocks
Overall Concept
The SOLIDWORKS Design Library makes it easy to locate and reuse your sketches, and favorite features—preventing you from having to complete the same work twice. Sketch Blocks within your SolidWorks sketches provide a simple, but powerful method of grouping objects together. Blocks are manipulated as one object, including constraining and dimensioning with other sketch entities.
Blocks also have incredible versatility. You can use them on drawings with the more traditional approach, or you can also use them at the part level inside of the sketch. At the part sketch level, this same block can be re-used in different part files to produce the same outline/contour. It can also be used at the part sketch level for something like a ‘logo’ which you want stamped onto multiple faces. Block can either stay in “Block” form, or they can be “exploded” back to sketch elements.
Define Sketch blocks
Dimensions in drawings are either True Dimensions or Projected Dimensions.
True dimensions are accurate model values and Projected Dimensions are 2D Dimensions.
In the tutorial we have an open sketch containing a single block.
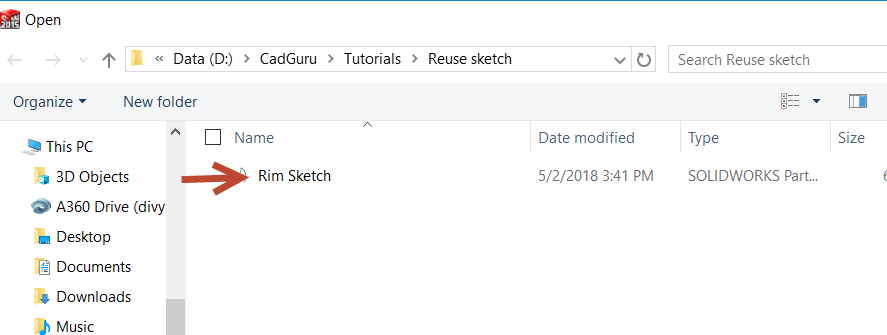
1. Please open file name- Rim sketch.
2. Rim sketch block is something we’ll want to be able to use in future designs, so we’re going to save the block to a central location.
3. But first, we’ll want to change the color of the block so it stands out form other geometry when it’s used.
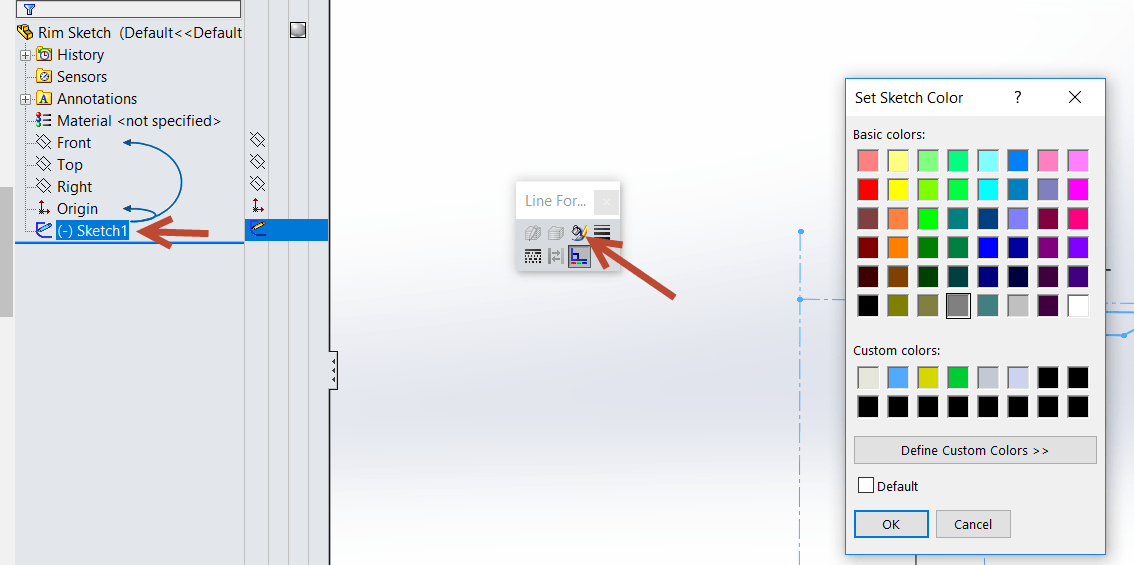
4. To do so, I’ll select it and then go to “Edit” > “Appearance” > “Sketch/Curve Color…” We’ll choose a green color, and then click OK, but when we do, the box still displays in black, denoting a fully defined sketch.
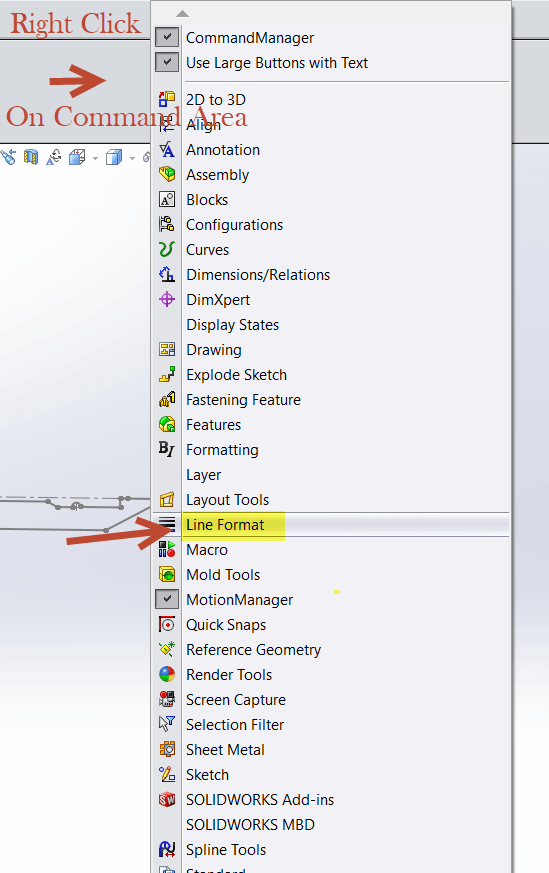
5. To display the sketch in color, we’ll first need to bring up the “Line Format” toolbar,
6. Select the sketch and change color display mode.
Creating Sketch Blocks
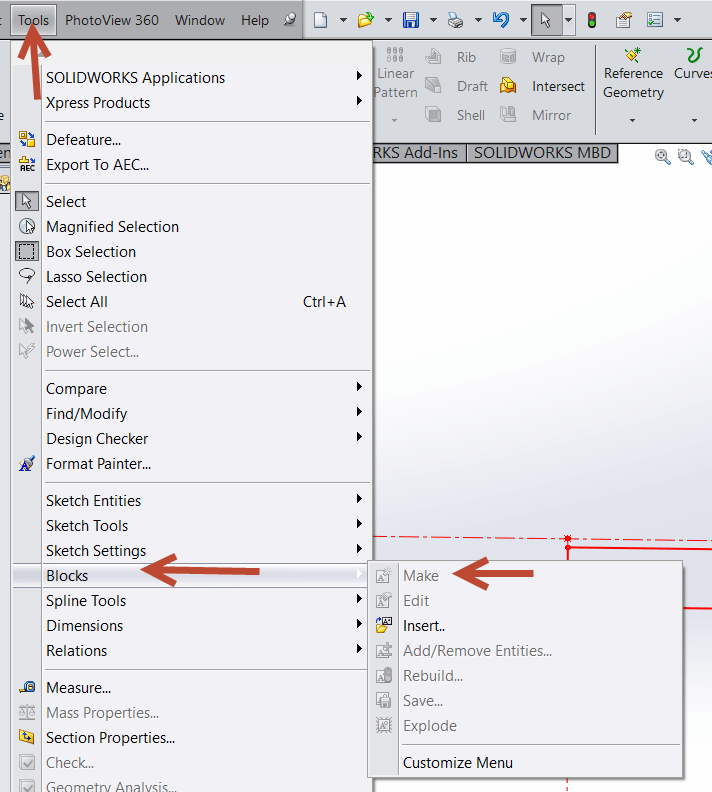
1. Sketch Blocks require objects, so the first step is creating the sketch objects. As you will be grouping them into a single entity they do not need to be dimensioned or constrained. From the Tools menu > Blocks flyout select Make. In the graphics window select the desired objects for the block.
2. Make sure you are in editing mode of sketch.
3. The selected objects appear in the Property Manager. To add additional objects just keep picking within the graphics window.
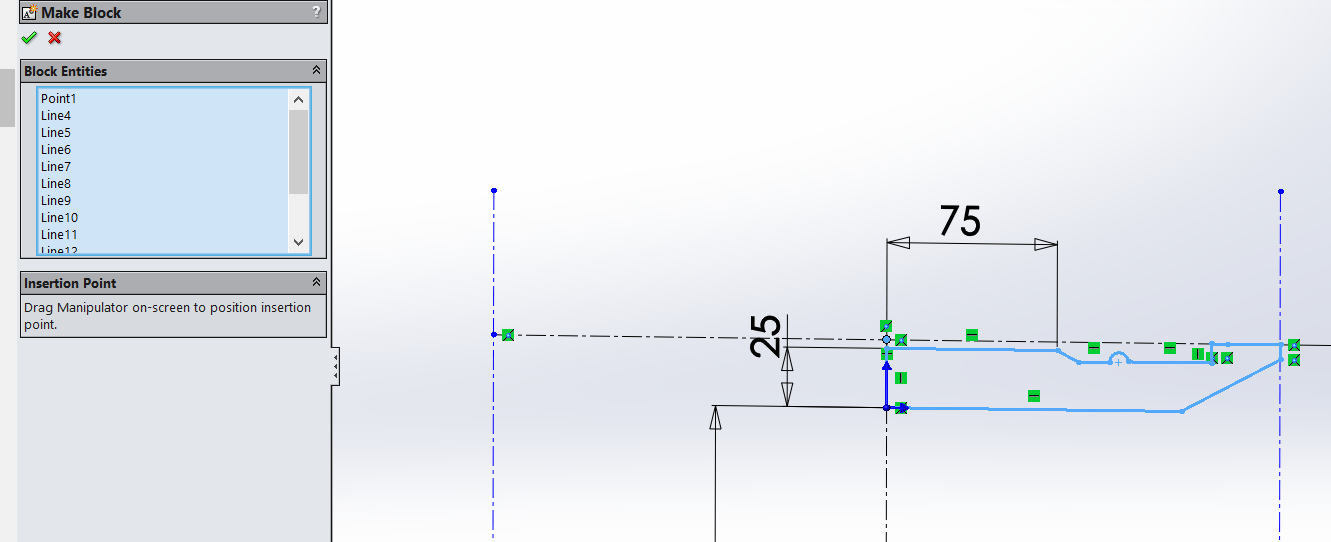
4. The insertion point is where your cursor will be when you insert instances of the block into your sketches. It is advantageous to adjust this location within the block as it makes it easier for placement. To adjust the insertion point, click-and-drag the manipulator to the desired location.
5. With the objects selected and the insertion point location set, press the green check mark at the top of the PropertyManager to create the block. Blocks behave as any other sketch entity, meaning you can dimension and constrain/relate them to other blocks and objects.
6. Selecting a block activates the Block PropertyManager. The Existing Relations sections lists all applied relations on the selected block, but can also be used to remove relations (right-click). Use the Add Relations section to apply additional relationships between the block and other objects in the sketch.
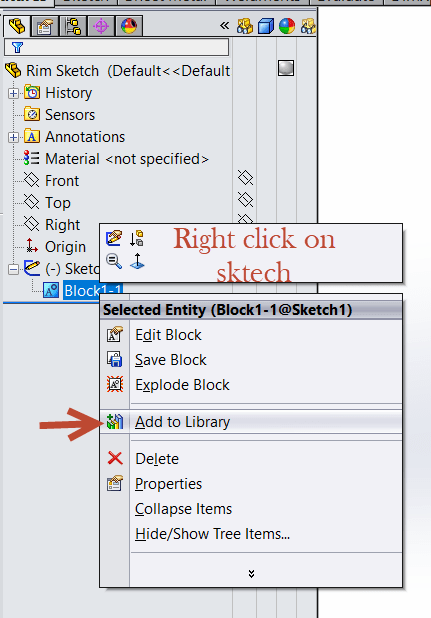
7. Right click on block and save as library part. Save the block with an easy to identify name in a location where you can find it again.
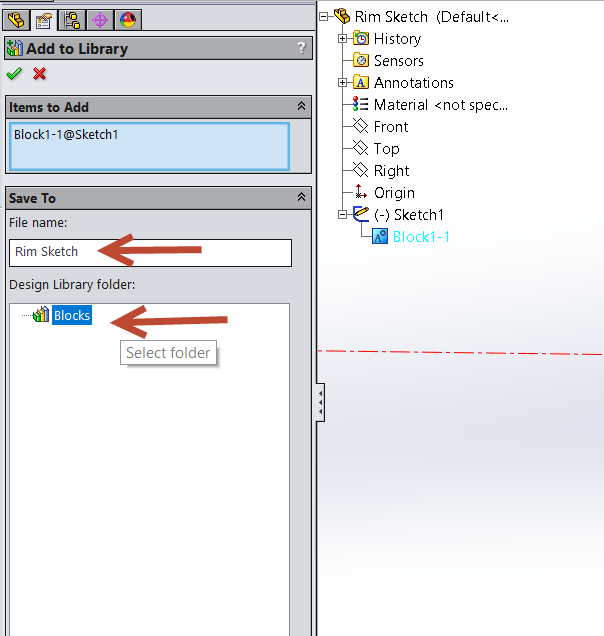
8. Give name to your block and select design library proper folder.
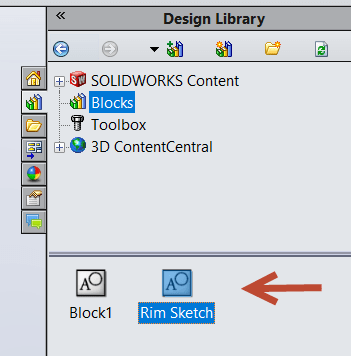
9. It is recommend creating a folder just for blocks; you can then add this folder to your Design Library. With the block saved, you are ready to use it in future designs.
Adding File Locations to The SOLIDWORKS Design Library
1. To navigation to the design library location within the task pane of SOLIDWORKS. This is located on the left-hand side of the UI and looks like the icon highlighted to the left.
2. Within the Design library pane, along the top of the pane, there are a few icons, we want to choose the 4th icon across which looks like the Design Library icon with an asterix above it, we can see the highlighted icon in the image on the left.
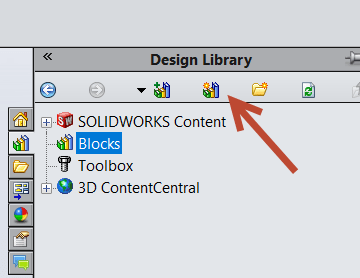
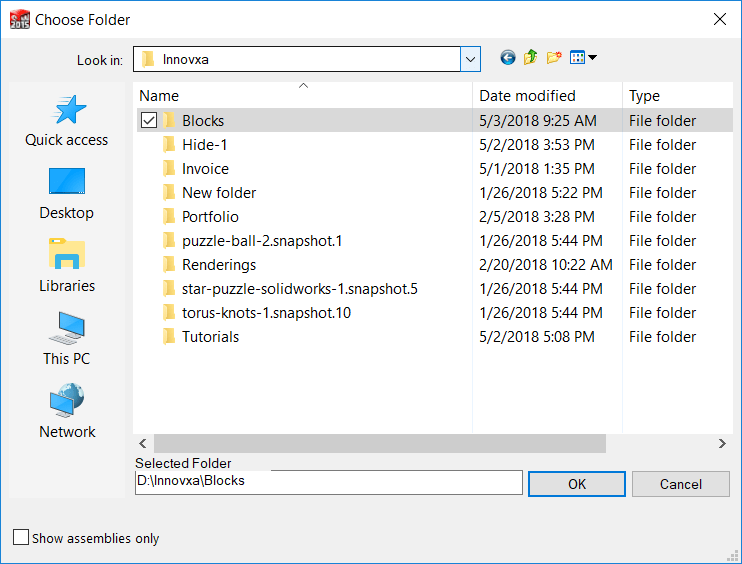
3. Once this button is clicked a dialog box will appear. From this dialog we will need to pick the desired folder location. This location will be the one added to the Design library locations.
4. This dialog box works just like selecting a folder location within Windows Explorer. Navigate to the folder to add, highlight the folder and select ok. This folder location and anything within the folder will then be added to the SOLIDWORKS Design library locations.
5. Add new folder name with blocks in to design library.
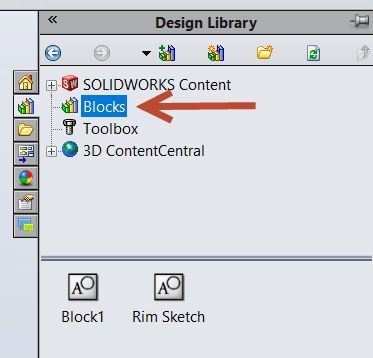
Note: The top level folder location we added in the previous step has been added to our Design Library locations within the task pane including any folders and files that exist within the top level folder. Take note how the folder name is Represented, so name with intent!
Add File Location:
Add an existing folder to the Design Library tab in the Task Pane.
This procedure is a shortcut to specifying a Design Library folder in Tools > Options > System Options > File Locations. See also Add Existing Folder.
In the Task Pane, select the Design Library tab ![]() .
.
1. Click Add File Location ![]() .
.
2. In the Choose Folder dialog box, browse to a folder, then click OK.
3. The folder appears at the top level (the same level as the Design Library, Toolbox, and 3D ContentCentral folders) in the upper pane and is referenced for Design Library in Tools > Options > System Options > File Locations.
Insert/Using sketch Blocks:
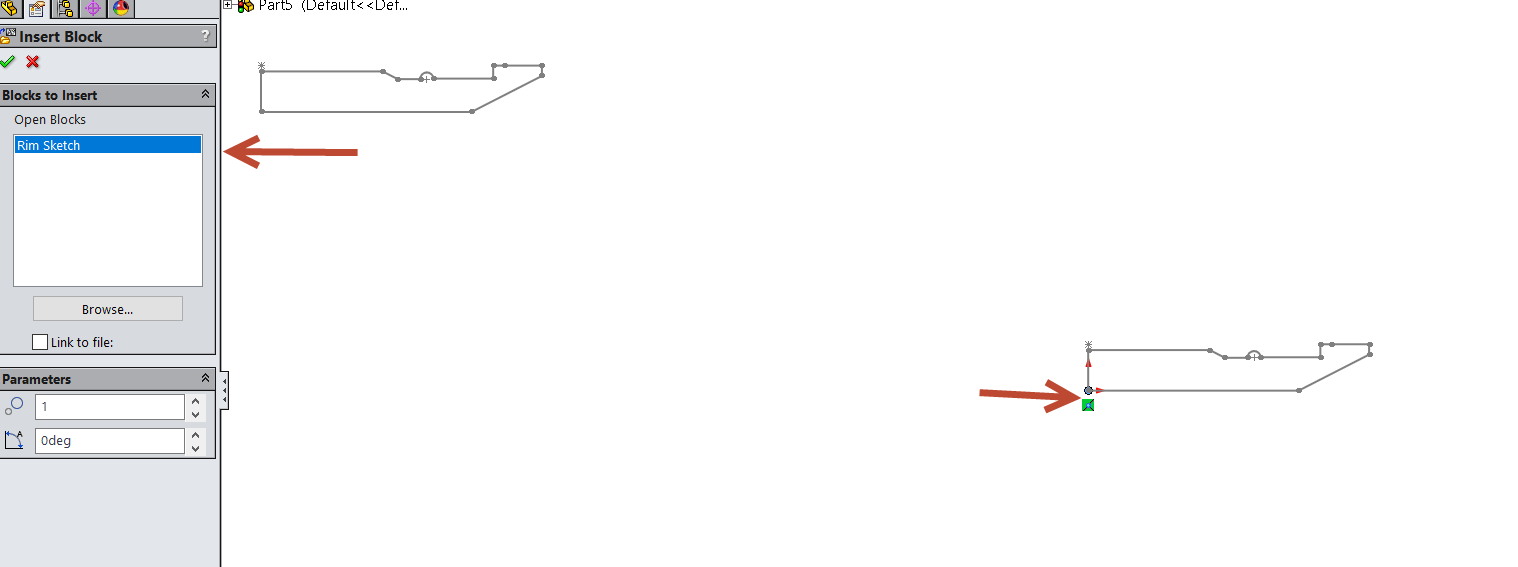
1. Open new part file or existing file where you would like to add this sketch block.
2. Start New sketch > Select plane where you would like to draw sketch.
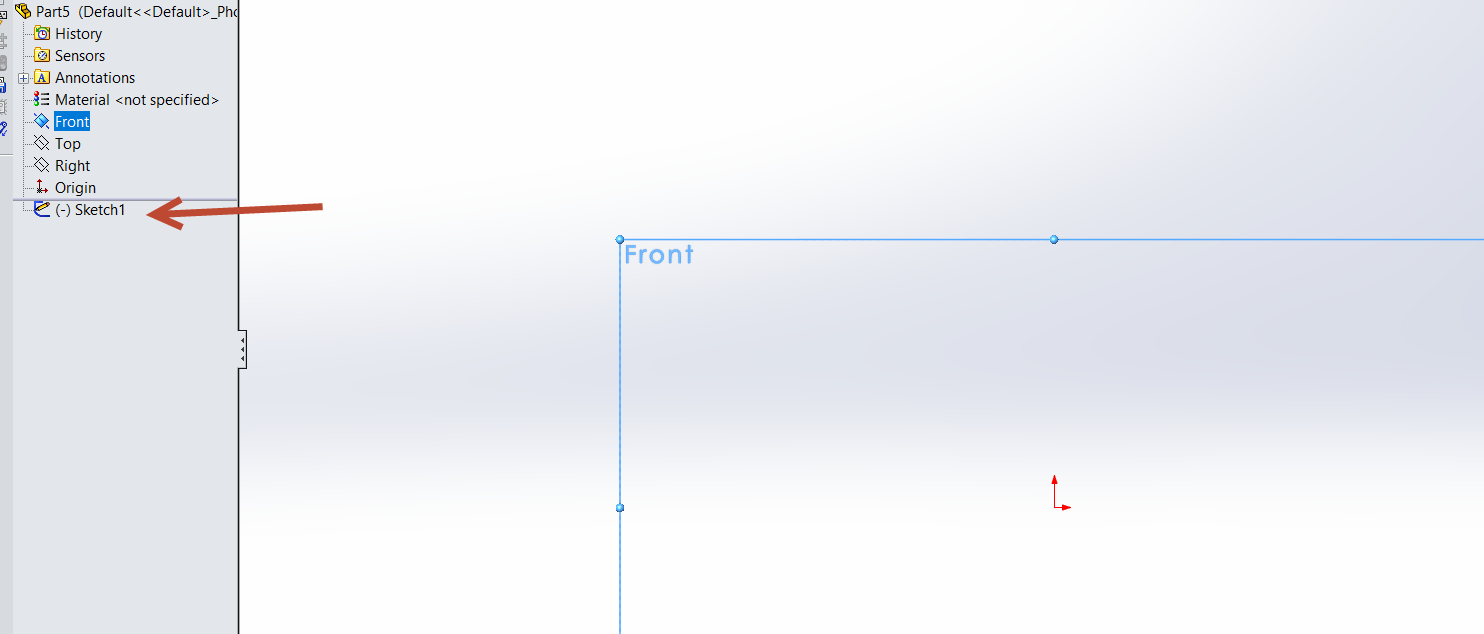
3. Feel free to drag and drop the sketch. It will pick up intersection point for block.
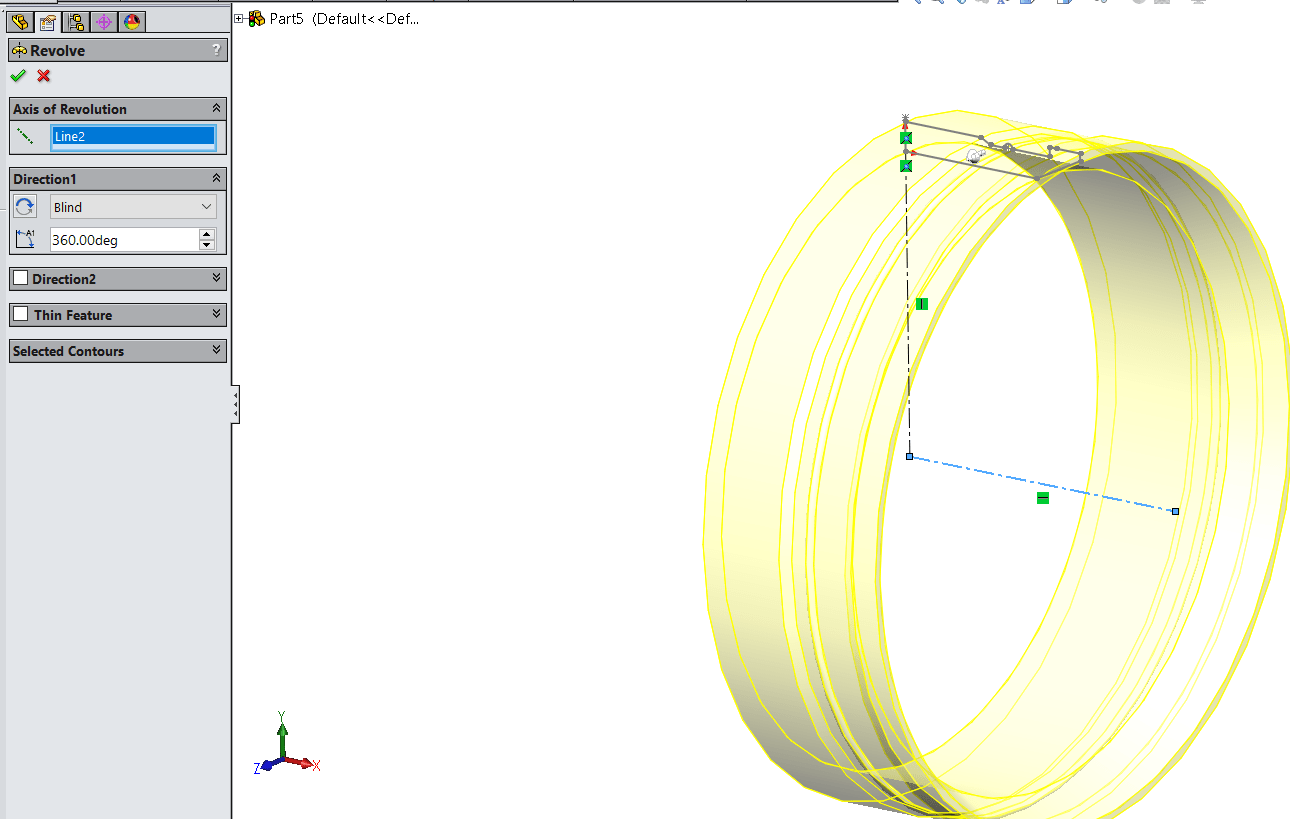
4. You can use sketch to create Rim feature.
Download the zip : Rim Sketch



Leave a Reply
Want to join the discussion?Feel free to contribute!