Performance Hack #013 : IT Installation : Repair Solidworks
SolidWorks Repair
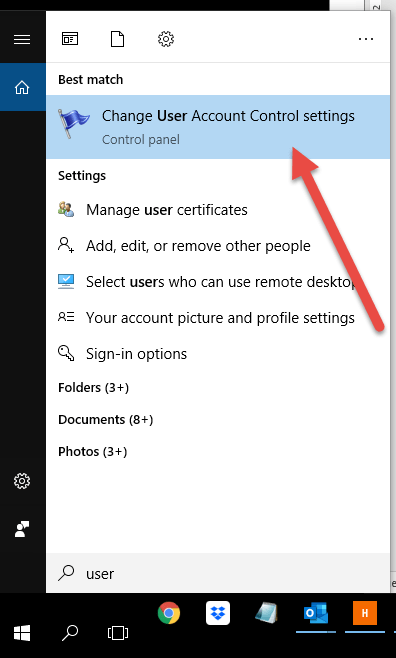
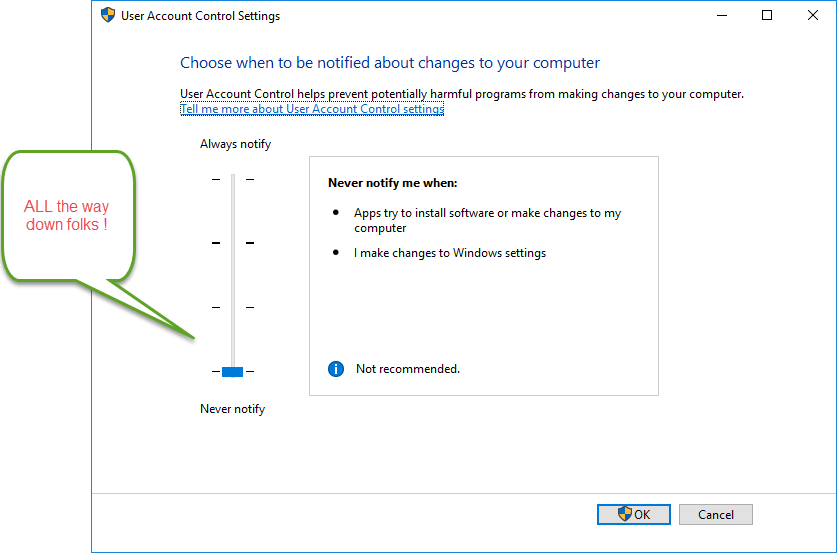
1. Check User Account Control Settings, and toggle / re-boot as required.
This program is designed to inhibit changes to the OS, however during an install, or during use of SolidWorks this could impact registry key writing. (aka SolidWorks Settings, and sub-routines)
2. If #1 checks and you haven’t done so yet, Re-Boot PC now.
*(FYI fact – rebooting daily is recommended for SolidWorks, the more the merrier)
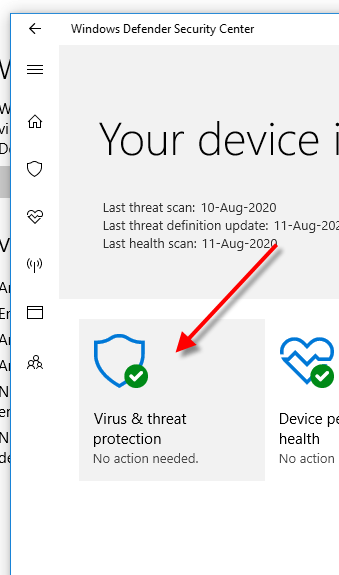
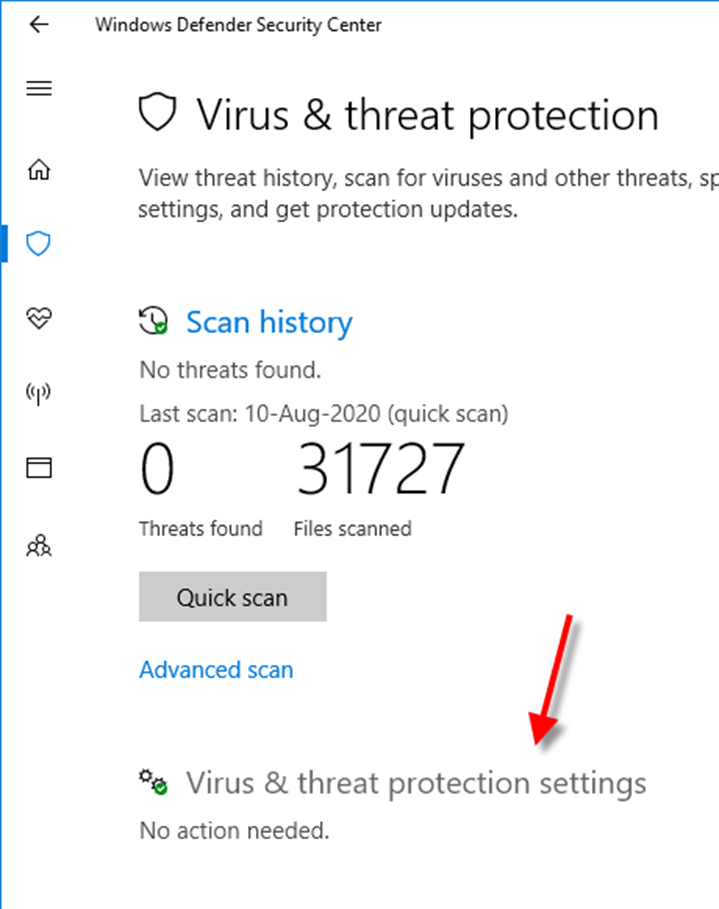
3. Disable Windows Defender

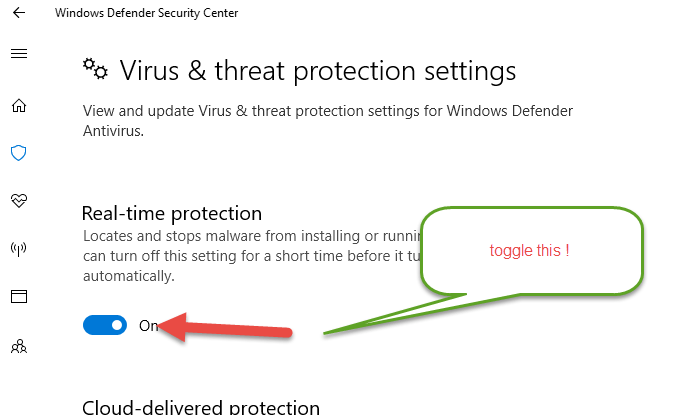

4. Disable ANY and ALL Anti-Virus’s for ENTIRE duration of REPAIR, and initial opening of SolidWorks after the Repair.
5. Generally a good idea at this point to confirm where the “source media” is. Or the Downloaded Media. If you don’t know at this point, that’s ok, SolidWorks can download the files. But can be handy to know where it is BEFORE starting.
6. Get to Programs and Features

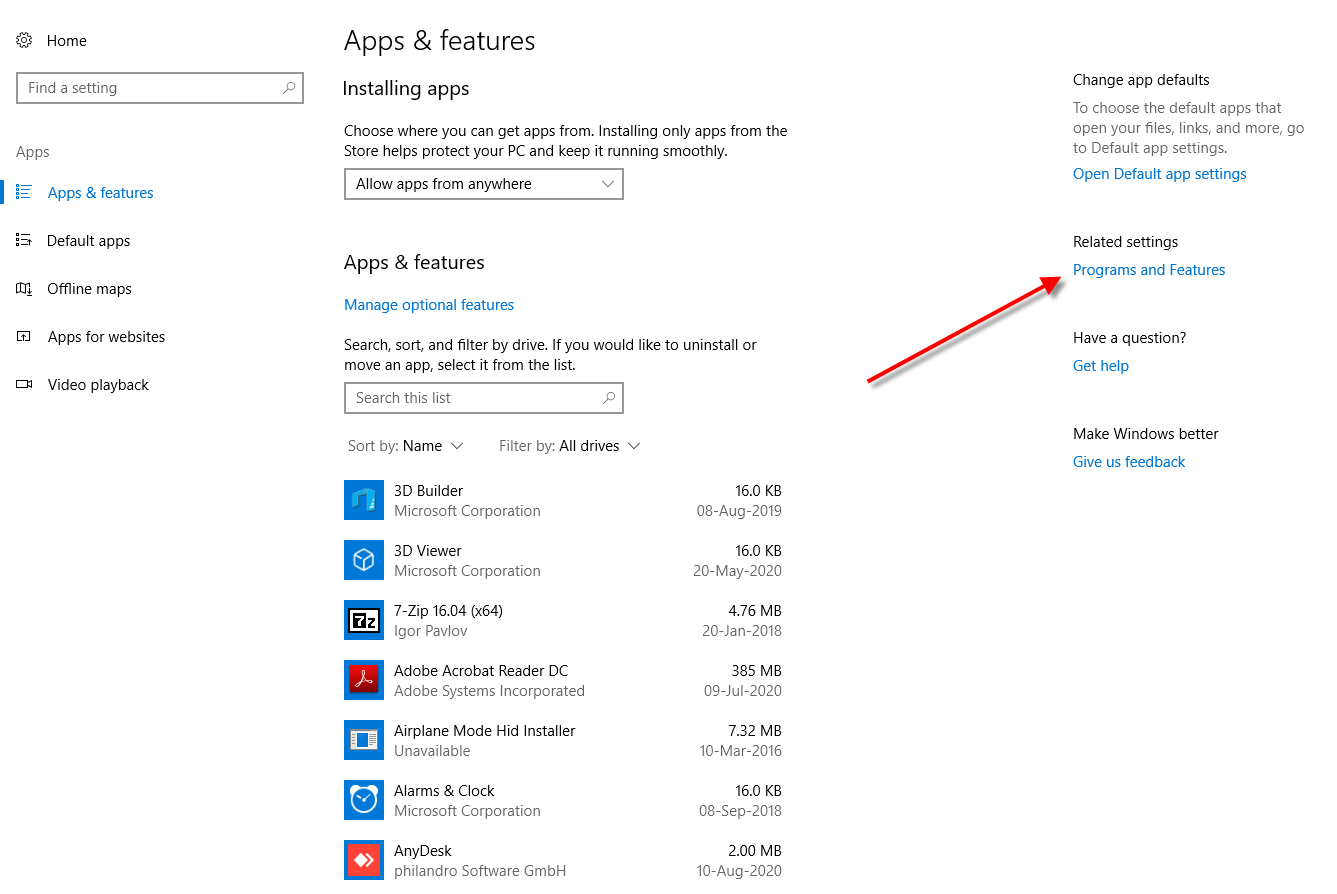
7. Now, in the “Programs and Features.
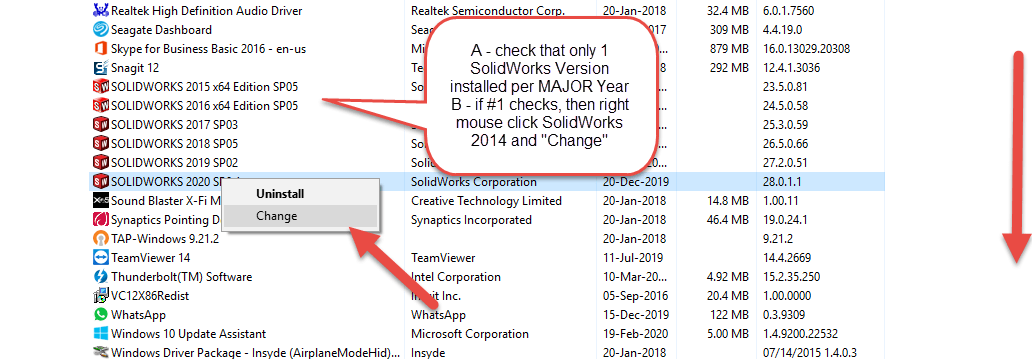
a. Check that there is only 1 Service Pack installed per MAJOR Year. If you have multiple Service packs per the SAME SolidWorks year, then you have a very botched install. Refer or inquire about “Clean Removal and Re-Install Guide”
b. Right Mouse click the SolidWorks Version for “Change”
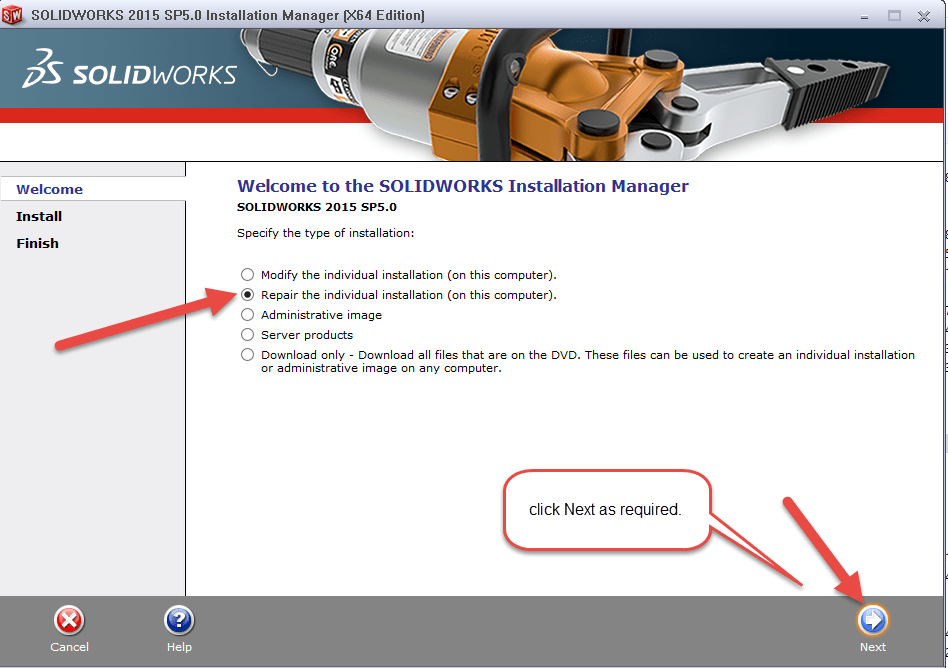
8. Performing the Repair. This is pretty straight forward, and there isn’t much to change. If SolidWorks does request media – point it to that location, worse case it will attempt to download.
9. If all goes well, and the repair didn’t product any hiccups. Open SolidWorks at least once. Then do a reboot.



Leave a Reply
Want to join the discussion?Feel free to contribute!